Screen recording on an iPhone is a powerful tool that allows users to capture on-screen activities effortlessly. Whether you want to create tutorials, save gameplay, document app issues, or record video calls, the iPhone’s built-in screen recording feature makes it simple. This article provides a step-by-step guide on how to enable screen recording, use it with or without sound, and troubleshoot common issues. Additionally, you’ll learn how to make the most of this feature with expert tips and discover its wide range of applications. By the end, you’ll have all the knowledge you need to create high-quality screen recordings on your iPhone.
What is Screen Recording on iPhone?
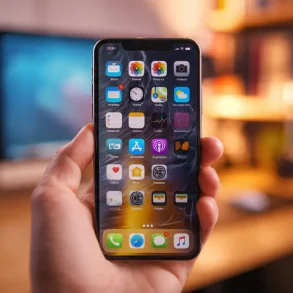
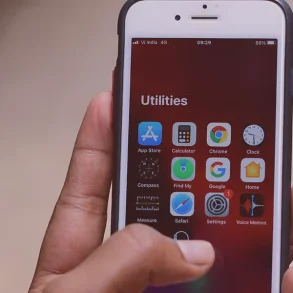
Screen recording on an iPhone is a built-in feature that lets you record your device’s screen activities. This function helps capture everything happening on your iPhone’s display, including app usage, gameplay, and more. It works seamlessly within iOS, saving recordings directly to your Photos app. The feature is particularly useful for creating videos, preserving digital moments, or troubleshooting tech issues.
How to Enable Screen Recording on iPhone
To use the screen recording feature, you first need to enable it in your iPhone’s Control Center. This ensures quick access whenever you want to record your screen.
- Open the Settings app.
- Tap Control Center.
- Scroll down to find Screen Recording.
- Tap the green plus icon (+) to add it to your Control Center.
Once added, you’ll see the screen recording icon in your Control Center, making it easy to start and stop recordings.
How to Record Screen with iPhone: A Step-by-Step Guide
Recording your iPhone screen is simple. Follow these steps to capture your on-screen activities effortlessly:
Difference Between Apple Stores and Authorized Resellers- Open Control Center by swiping down from the top-right corner (for Face ID models) or swiping up from the bottom (for Touch ID models).
- Tap the Screen Recording button, which looks like a circle inside another circle.
- A three-second countdown will appear, signaling the start of your recording.
- Once recording begins, a red indicator will appear at the top of your screen.
- To stop recording, tap the red indicator and confirm “Stop,” or open Control Center and tap the Screen Recording button again.
- Your recording will be saved automatically in the Photos app.
How to Record Screen with Sound on iPhone
Adding sound to your screen recording is ideal for creating tutorials or narrating your actions. Here’s how to include audio:
- Open Control Center and long-press the Screen Recording button.
- Tap the Microphone icon to turn it on.
- Start your screen recording as usual.
With the microphone enabled, you can capture your voice along with internal app sounds. This feature makes your recordings more engaging and informative.
Tips for High-Quality Screen Recordings
Creating professional, high-quality screen recordings requires some preparation and attention to detail. Here are key tips to improve your recordings:
Do iPhones Get Viruses? Here’s What You Need to Know- Clear Notifications: Enable Do Not Disturb mode to prevent pop-ups and interruptions during recording.
- Close Background Apps: Shut down unnecessary apps to ensure smooth performance and avoid unexpected distractions.
- Plan Your Recording: Outline what you want to demonstrate beforehand to keep your recording clear and concise.
- Maintain a Steady Pace: Avoid rapid movements to ensure viewers can follow your actions easily.
- Check Storage Space: Ensure your iPhone has enough storage, as long recordings can consume significant space.
Before you start recording your screen, ensure your iPhone is functioning optimally and free of unnecessary glitches. If you’re experiencing persistent software issues or performance lags, you might consider learning to reset your iPhone to factory settings to resolve these problems and ensure a smooth screen recording experience.
Common Uses of Screen Recording on iPhone
The screen recording feature has a wide range of practical applications, making it a versatile tool for personal and professional use. Here are some common scenarios where screen recording is useful:
- Creating Tutorials: Teach others how to use an app or perform a task.
- Recording Gameplay: Capture your best gaming moments to share with friends or post online.
- Saving Social Media Content: Record temporary stories or live streams from platforms like Instagram or Snapchat.
- Troubleshooting Issues: Document bugs or errors to share with customer support or IT teams.
- Capturing Video Calls: Save important video call moments for reference or documentation.
Troubleshooting Common Screen Recording Issues
While screen recording on an iPhone is straightforward, you might encounter some issues. Here’s how to resolve common problems:
How to Change Font Style on iPhone Without App (2026 Guide)- Recording Won’t Start: Restart your iPhone and ensure you’ve enabled screen recording in Control Center. Also, check for available storage space.
- No Sound in Recordings: Ensure the microphone is enabled by long-pressing the Screen Recording button and toggling the microphone option.
- Recording Stopped Unexpectedly: This can happen if your iPhone runs out of storage or overheats. Free up space or let your device cool down before trying again.
- Can’t Record Certain Apps: Some apps block screen recording due to privacy or copyright restrictions. This is normal and cannot be bypassed.
Frequently Asked Questions
Where Do Screen Recordings Save on iPhone?
Screen recordings are automatically saved in the Photos app. You can find them in a dedicated “Screen Recordings” album or in your main photo library.
How Long Can I Record My Screen?
The recording length depends on your iPhone’s available storage and processor capacity. Most iPhones can record for hours if sufficient storage is available, though shorter clips are recommended to save space.
Can I Edit My Screen Recordings?
Yes, you can edit recordings directly in the Photos app. Trim the edges, crop the frame, or add filters to enhance your videos.
How to Reset an iPhone to Factory Settings: Quick & Easy GuideDoes Screen Recording Capture Notifications?
Yes, any notifications that appear during the recording will be captured. Enable Do Not Disturb mode to avoid this.
Can I Screen Record While Using Other Apps?
Yes, screen recording works in the background while you use other apps. However, some apps may restrict recording for privacy reasons.
Best Practices for Using iPhone Screen Recording
To make the most of the screen recording feature, keep these best practices in mind:
- Respect Privacy: Avoid recording private or sensitive content without permission.
- Use Landscape Mode: For videos intended for sharing, record in landscape mode to match common video formats.
- Keep Videos Short: Long videos can become hard to manage. Trim recordings to focus on key moments.
- Test Before Sharing: Review your recording for clarity and accuracy before sharing it with others.
Conclusion
Learning how to record screen with iPhone is an invaluable skill for both personal and professional use. With this built-in feature, you can easily capture tutorials, gameplay, app demonstrations, and more. By following the steps outlined in this guide and implementing the tips provided, you’ll be able to create high-quality screen recordings with ease.
Remember to enable the feature in your Control Center, plan your recordings carefully, and respect privacy and copyright when sharing your videos. Now that you know how to record screen with iPhone, the possibilities are endless—happy recording!