In this easy tutorial, we will teach you how you can design a business card that is “glazed” on the top. The effect is very sleek, minimalist, and most importantly, very easy to do. So anyone with a decent amount of creativity and will to learn should be able to do this using Adobe Photoshop. If you want to try out something new and interesting for your custom business card design, then here are the instructions that you would want to follow.
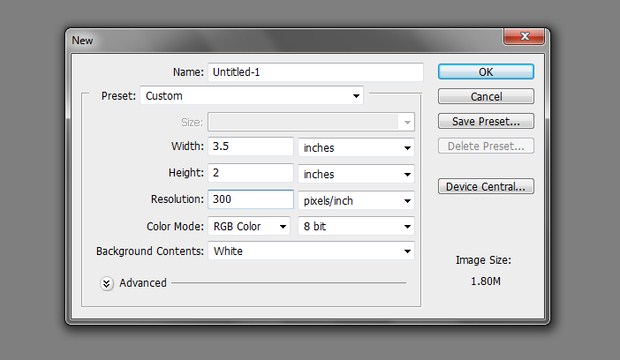
1. With Adobe Photoshop open, setup our business card document initially with your chosen business card specifications. While you can set the size technically to any dimension you want, it is crucial that you always set the resolution to at least 300ppi. Below are the settings we used for the example. This can be a good starting point for your own custom business card design.
- Width: 3.5 inches
- Height: 2 inches
- Resolution: 300ppi
- Color Mode: CMYK
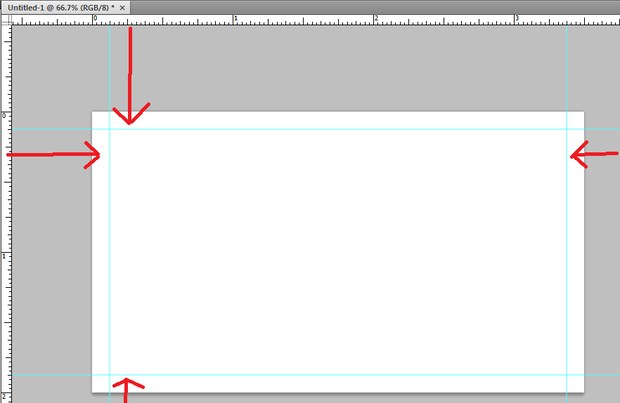
2. Now, before we actually do the designs, it is wiser to always add in some guidelines. This allows you to be more careful when placing design elements such as text and images. So first, bring up the rulers by pressing CTRL+R. Once you see the rulers on the top and left side of your design space, click and drag your mouse from one ruler to the canvass itself. You will see a guideline get created. Create 2 horizontal and 2 vertical guidelines each at 0.25 inches away from the edge. These will be your margin lines.
15 Best Adobe Photoshop Tutorials of 2015
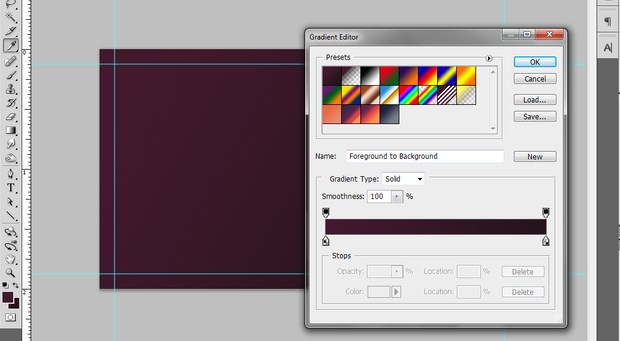
3. Now, first we fill our background with color. While it is okay to just use a plain color of your choosing, it is better to go for more dynamic colors. That is why in this example, we are using the gradient color tool. Simple choose this on the tools panel and then choose your gradient color combination by clicking on the gradient color box on top in the options bar. Once chosen, click and drag the tool across the background layer to get the gradient color effect.
Collection of Double Exposure Effect Photoshop Tutorial
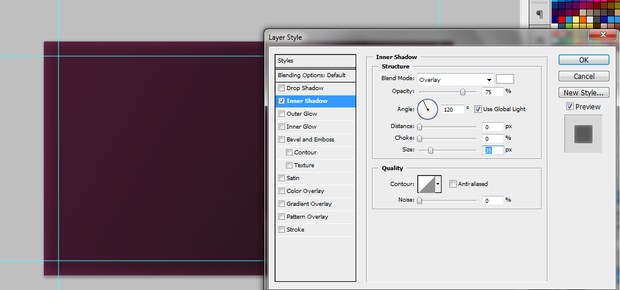
4. Duplicate our background by pressing CTRL+J. Then, double click on our duplicate to access its layer style options. The first thing we will add is the “Inner Shadow” layer style. Change the Inner shadow settings as follows.
Stunning Photoshop Tutorials- Blend mode: Overlay
- Color: WHITE
- Distance: 0px
- Size: 35px
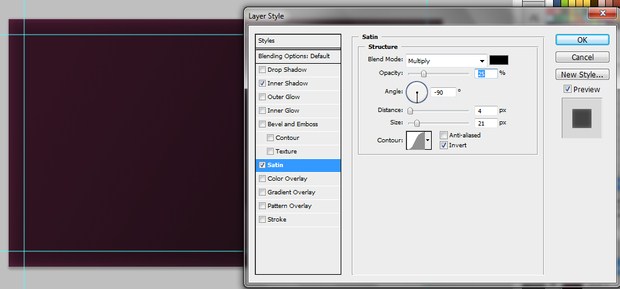
5. Then, click on “Satin”. Change the settings for satin as set below.
Creating a Dark and Sleek Brochure Design in Photoshop- Blend Mode: Multiply
- Color: Black
- Opacity: 25%
- Angle: -90 degrees
- Distance: 4px
- Size: 21px
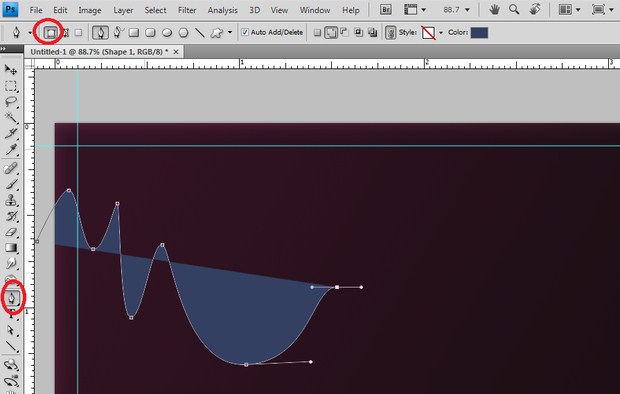
6. Now, select the PEN tool in the tools panel. Once activated, make sure you select the option to “shape layer” on top in the options bar. Then, start drawing some curves. It takes time to get the hang of the pen tool, but with just a few tries you should know how these curves work.
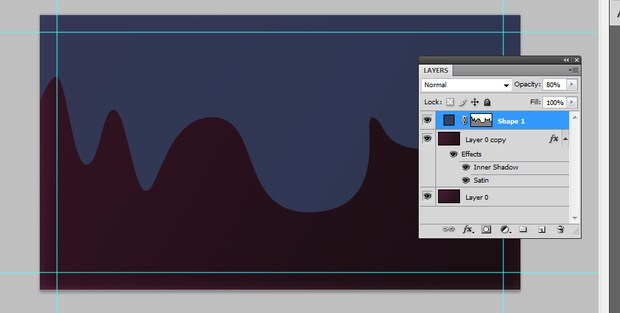
7. Once you are done with your shape. Change its opacity in the layers panel to 80%.
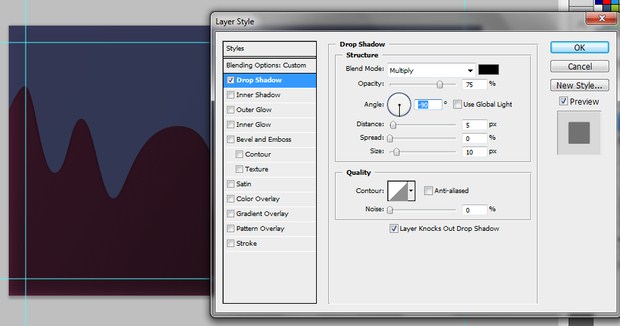
8. Then, we shall add some layer styles on this shape. Double click on it to access the layer styles. First, click on the “drop shadow” option. Set these values for the properties of this style:
- Angle: -90 degrees
- Distance: 5 pixels
- Size: 10 px
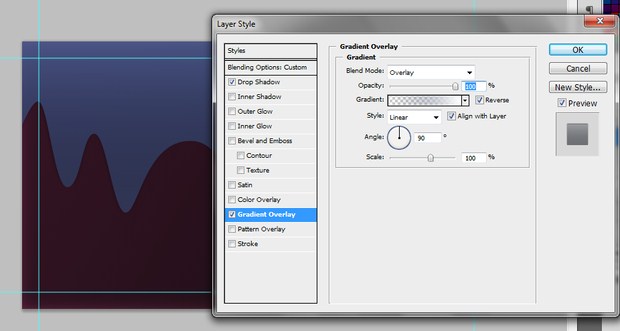
9. Next, select the option for “Gradient Overlay.” Change its style properties to these settings:
- Blend mode: Overlay
- Gradient: Transparent to White
- Style: Linear
10. Now we will add a slight frosted look into our glaze layer. Create a new layer by pressing CTRL+SHIFT+N. Name the layer something like “frosted layer”. Fill this layer with black. Do this easily just use the paint bucket tool. Do not worry about the whole document being black, this will change later.
11. Then, go to Filter ->Noise -> Add Noise… In the window that opens, set the noise amount to 20%. Also set the distribution method to Gaussian and tick off the Monochromatic checkbox.
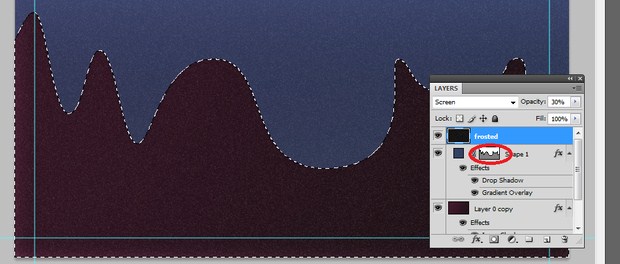
12. Now, here is where we remove the black. With the black frosted layer selected, change its blend mode to “Screen”. Then reduce its opacity to 20%-30%.
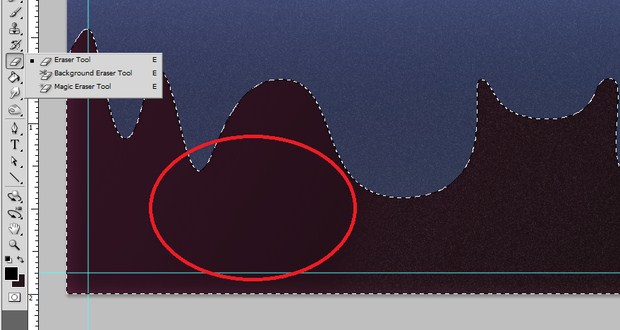
13. Next, we have a special erasing technique. First, hold down the CTRL key and then click on the shape thumbnail of our frosted layer. This will select the layer area. Then, press CTRL+SHIFT+I to invert the selection.
14. Then, of course, we use the eraser tool to remove the areas that are not in the frosted area. Once you are done, press CTRL+D to deselect the area.
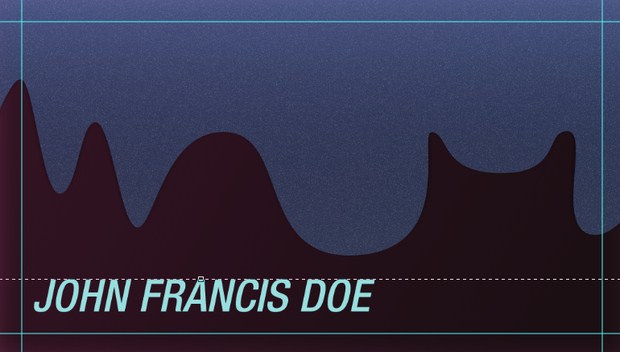
15. We should now have our basic glazed design to our business card like so. It will now be time to add some text.
16. Using the text tool, we type in the name for our business card. Make sure to use a nice contrasting color for the text. Also, choose a nice and clean font style. It is best to keep this simple and use sans serif family fonts.
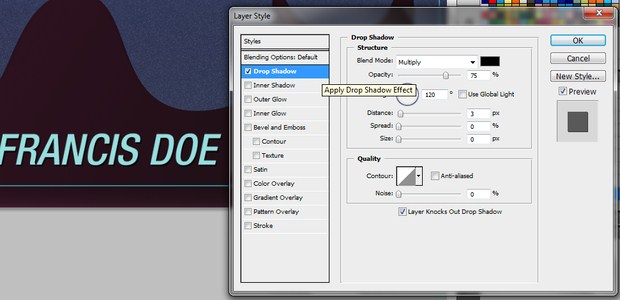
17. Now, we will add layer styles to the text. Simply double click on the text to access its layer style. Then choose the option to add a “Drop Shadow”. Use these values for the style properties.
- Distance: 3
- Size: 0
- Test default
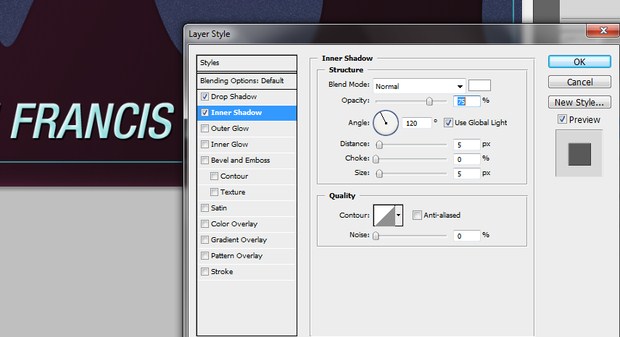
18. Then, click on “Inner Shadow”. Change the following properties.
- Blend mode: Normal
- Color: White
- Rest default.
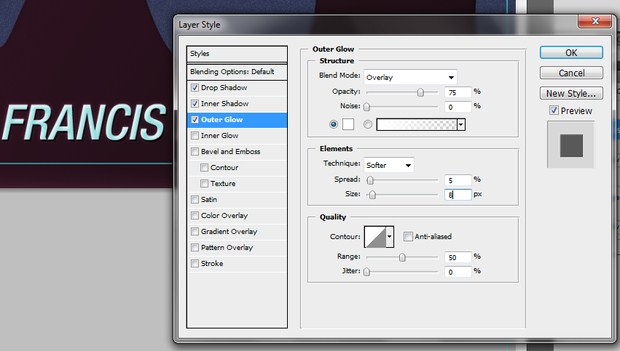
19. Then click on “Outer Glow”. Use these properties for this effect.
- Blend Mode: Overlay
- Color: WHITE
- Spread: 5%
- Size: 8px
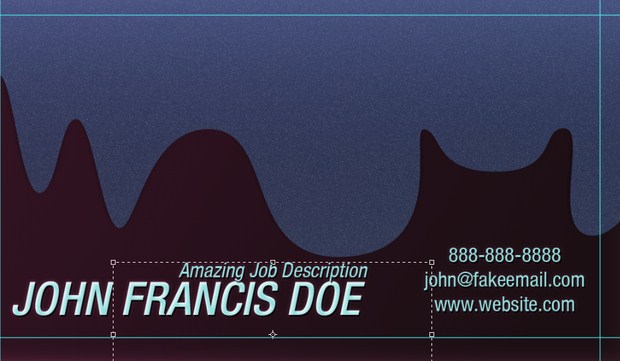
20. Then, just add the rest of the needed text. We also added the same layer styles as with the original text.
21. Great! That finishes our glazed styled business card. You should know now how you can recreate the same style for your own custom design. Congratulations.


