Creating a prototype is an essential part of the product development cycle. It allows you to test out ideas, design features, and get feedback from potential users. Unfortunately, creating a prototype can be a time-consuming and expensive endeavor. But with the right tools and techniques, you can create a prototype in 10 minutes or less.
Prototyping is a crucial aspect of the design process for any product. It is one of the most effective ways to visualize and test your idea before committing to full-scale product development. But the process of prototyping can be time-consuming and complicated.
In this ultimate guide to prototyping, we will show you how to get started quickly and efficiently. We’ll cover the basics of prototyping, the tools available, and a brief overview of the prototyping process. We’ll also provide tips and tricks that will help you create a successful prototype, no matter the time constraints.
That’s why we’ve put together this Ultimate Guide to Prototyping. This guide will provide you with an overview of the prototyping process, instructions for creating a prototype in 10 minutes or less, and tips for refining your prototype into a successful product. By following the steps outlined in this guide, you will be able to create a successful prototype quickly and efficiently. So if you’re ready to get started, let’s dive right in!
Why You Should Prototype
Prototyping is a key part of the product development process. It is an essential tool for quickly validating and refining concepts, reducing risk, and ultimately, creating better products. If you’re working on a product, whether it’s a website, a mobile app, or even a physical product, prototyping is an important step that should not be overlooked.
How to Forward Calls on iPhone: A Complete Guide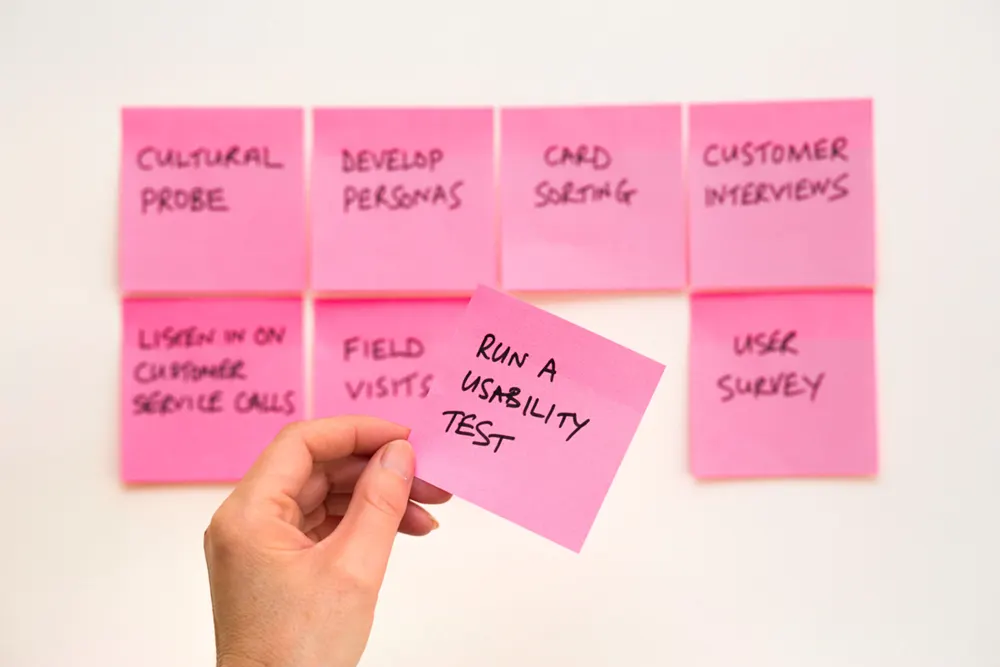
So why should you prototype? Here are six reasons why prototyping can benefit your product and your team.
- Validate concepts quickly and cheaply: Prototyping helps to quickly validate ideas without investing a lot of time or money. It allows designers to create a low-fidelity version of the product to test out different ideas and concepts. This can help to quickly identify what works and what doesn’t, preventing you from investing too much in an idea that may not work out.
- Improve the user experience: Prototyping helps to identify potential usability problems before the product is released. This can save you a lot of time and money by avoiding problems that can arise from a poor user experience.
- Test assumptions: Prototyping is also a great way to test assumptions. By creating a prototype of the product, you can test assumptions about the user experience, interaction, and design. This can help to identify weaknesses in the product and allow for improvements.
- Gather feedback: Prototypes can also be used to gather feedback from users. This can help to refine the product and make sure it meets the needs of the users.
- Reduce development time: By prototyping, you can reduce the amount of time it takes to develop the product. This can save money and time, allowing you to focus on other aspects of the product.
- Improve communication: Prototyping helps to improve communication between the product team and users. By creating a prototype, users can give feedback and suggestions to the product team, helping to improve the product more quickly.
Prototyping is an essential step in the product development process. It helps to quickly validate, refine, and improve concepts, as well as reduce development time and cost. If you’re working on a product, it’s important to take the time to prototype and test out different ideas. Doing so can help to ensure the success of your product and make the development process smoother.
Steps for Creating a Prototype

Here are the steps for creating a prototype:
How Much Does TikTok Pay You for 1 Million Views? A Comprehensive Guide to Monetizing Your TikTok Success- Gather Requirements: Before you can create a prototype, you need to have a clear understanding of what the product needs to do. Analyze customer needs and make sure you have a thorough understanding of the requirements before beginning the design process.
- Develop a Concept: Once you have your requirements down, it’s time to develop a concept. Brainstorm ideas and create sketches to explore different design approaches. Evaluate each concept to determine which one best meets the requirements.
- Create a Storyboard: A storyboard is a visual representation of the user journey. It walks you through each step of the user experience, helping you to identify potential areas for improvement. Create a storyboard for your concept and use it as a roadmap for the prototype.
- Choose a Design Tool: There are many design tools available for creating a prototype. Choose the one that best fits your needs, budget, and skill level. Popular tools include Sketch, Adobe XD, and Figma.
- Create the Prototype: Once you have your storyboard and design tool ready, it’s time to create the prototype. Start by adding in your design elements and then create the interactions. Test the prototype to make sure it works as expected.
- Iterate and Refine: The prototype is never finished. As you continue to test it, you’ll discover areas that need improvement. Make these changes and continue to test until you have a prototype that meets the requirements.
By following the steps outlined above, you can create a prototype that helps you explore ideas, test concepts, and gather feedback before investing resources in developing a product.
Define the Problem
Problem definition and prototyping are two closely related concepts that are essential components of any successful product development process. When it comes to product development, problem definition and prototyping are crucial steps in the process of discovering, designing, and launching a product.
Problem definition involves the process of identifying and understanding the problem that the product is designed to solve. This process begins by gathering information and feedback from stakeholders, such as customers, industry experts, and other product teams. After the data is gathered, it’s important to analyze it to better understand the problems that need to be solved. This involves developing a comprehensive understanding of the customer’s needs and wants, industry trends, and other relevant factors. Once the problem is understood, it’s important to define it in terms of the customer’s needs.
10 Alternatives to Visio Free That Will Help You Create Better Diagrams and FlowchartsPrototyping is the next step in the product development process. This is the process of creating a working model of the product to test the concept and determine if it can be feasibly developed. The prototype can be as simple or as complex as needed, depending on the goals and objectives of the product. Prototyping can be done through physical models, computer simulations, or even actual products. It’s important to ensure that the prototype is representative of the final product and that it meets the customer’s needs.
Problem definition and prototyping are essential components of the product development process. Both processes are essential for understanding the customer’s needs and want industry trends, and other relevant factors. By defining the problem and creating a prototype, product teams can ensure that the product they are developing will be successful and meet their customer’s needs.
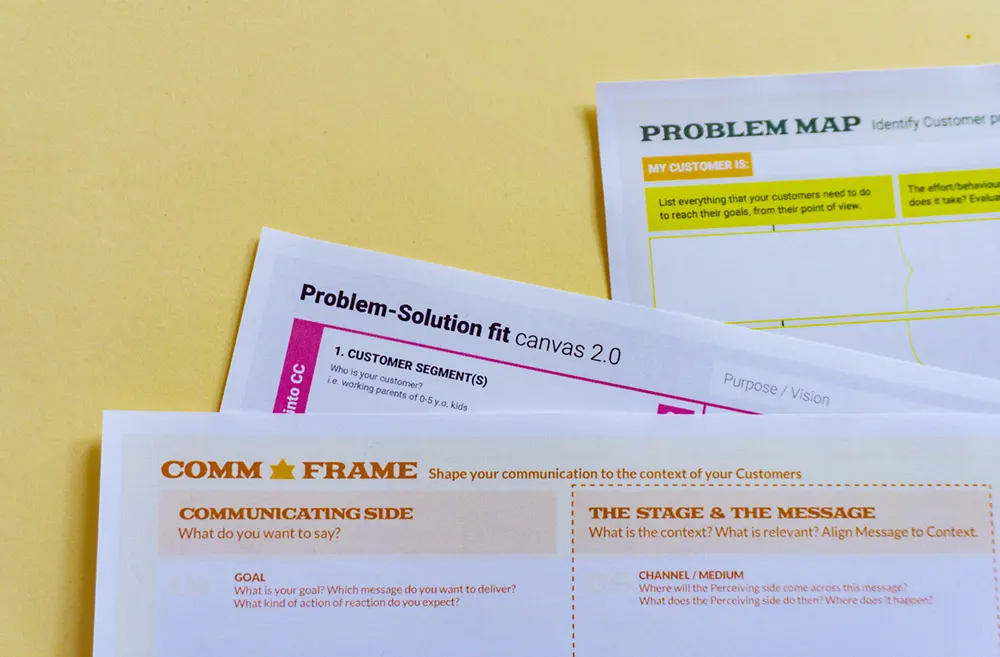
Choose the Right Tools
Whether you’re a designer, developer, or product manager, the right prototyping tools can make or break your project. From low-fidelity wireframes to high-fidelity interactive prototypes, the right tools can create a cohesive user experience and help bring your vision to life.
How to Be an SEO Content Writer in 2026: The Ultimate Career RoadmapSo, how can you be sure you’re choosing the right tools for the job? Here are some tips to help you select the best prototyping tools for your project:
- Define Your Needs: Before you start shopping for the right prototyping tools, it’s important to define your needs. Consider the type of project you’re working on, the complexity of your prototype, the resources you have available, and the timeline you’re working with.
- Evaluate Your Options: Once you’ve identified your needs, it’s time to start evaluating your options. Look into different types of prototyping tools, such as wireframing tools, user interface tools, and interactive tools. Consider the features each tool offers and how they match your project requirements.
- Consider Your Budget: When it comes to choosing the right tools for prototyping, you don’t always have to break the bank. Some tools offer free trials or limited versions that can be helpful for certain projects. Keep your budget in mind when evaluating your options and be sure to look for the best value for your money.
- Test and Validate: Once you’ve chosen the right tools for prototyping, it’s important to test and validate the prototypes. Testing helps you uncover potential user experience issues before the product is released.
Choosing the right tools for prototyping is essential for successful product development. By following these tips, you can be sure you’re selecting the best tools for the job and creating great user experiences.
Design the Prototype
There are several steps involved in designing a prototype:
- Plan and strategize. Before creating the prototype, it is important to consider the goals of the project and the target audience. What type of product needs to be developed? What will the user experience be like? What tasks need to be completed? All these questions need to be answered before the design process begins.
- Research. Research is an essential part of the product development process. It involves researching trends, competitive products, customer needs, and other elements that might influence the design of the product.
- Ideation. Once the research is complete, it is time to begin ideating. This involves sketching, brainstorming, and creating mock-ups of the product. It is important to consider the user experience and how the product will interact with the user.
- Create a prototype. Once the research and ideation are complete, the product can be created in a prototype form. This can be done using a variety of tools, such as 3D printing or CAD software.
- Test and refine. After the prototype is created, it is important to test it and gather feedback from potential users. This will help identify any issues or areas for improvement. With this feedback, the product can be refined and improved upon until it is ready for production.
Conclusion
In conclusion, creating a prototype in 10 minutes or less is not only possible, but it’s also incredibly easy. With the right tools and processes in place, it’s possible to quickly create a functional prototype that can be used to test and refine your product or service. Prototyping is an invaluable part of the development process, and with the right techniques, you can create an effective prototype in a short amount of time.